Sawtooth Rifles - Build #1: .22-250 Remington Varmint Barrel for a Savage 110.
Spec's:
Action: Savage 110
Barrel Blank: Adams and Bennett, .224 Cal, 1:12", CM, F54 contour, finished at 26"
Stock: Bell and Carlson DuraMaxx
Bottom Metal: Savage Metal trigger guard
Trigger: Tuned Savage non-accutrigger
Rings/Bases: Leupold
Optic: Leupold VX-III 6.5-20 x40, 30mm tube, Varmint Hunter Reticle
Finish, Metal: Armor Black Cerakote (barrel only)
Finish, Stock: B&C factory finish
For our first barrel job, we talked a good friend into trying out a new barrel on his Savage 110. His factory Savage was a sporter weight .22-250 Remington so he wanted to stick with the .22-250 to allow testing with his current components and handloading equipment. We sourced an Adams and Bennett F54 blank for the job. This is an economic blank that gets good reviews, and the F54 is fairly similar to a Remington Varmint profile. For this build, we simply machined the barrel blank to fit the Savage action as it was, and sent the finished barrel to our friend to install and test.
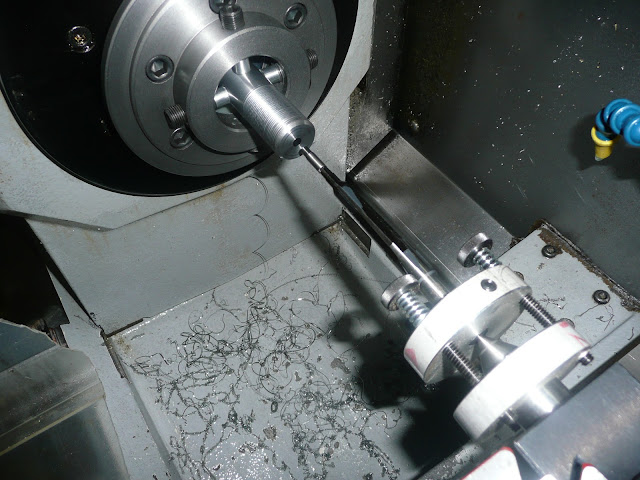
The first step in preparing the blank for a Savage was to turn down the diameter of the tang end of the barrel to the dimensions required for the Savage. The tang was left oversized of the savage thread, so it could be turned down further later when it could be aligned by the bore.
 |
| The barrel blank set up in a collet chuck, supported by the tailstock. |
 |
| Turning down the tang of the barrel blank. |
The barrel was then set up with spider chucks on each end and aligned with the bore true to the lathe's axis. The outside diameter of the tenon was then turned to the thread's required dimensions and then the tenon was threaded and test fit to another Savage action.
 |
| Alignment of the chamber end of the barrel blank. |
 |
| Threading the barrel tenon. |
 |
| Testing the thread fit on another Savage action. |
With the thread fit satisfactory, it was time to cut the chamber. The finishing reamer was used to cut the chamber to the proper depth. On the Savage rifle, the final headspace is set using the barrel nut to lock the barrel into the receiver at the proper depth.
 |
| Initiating the chamber reaming process. |
 |
| Checking the chamber depth with a depth micrometer and the GO-gauge. |
The barrel was then swapped end for end in the lath and a varmint/target style crown was cut after aligning the end of the bore true to the lathe's axis.
 |
| Target crown cut on the opposite end of the barrel. |
 |
| Comparison of the finished barrel and similar blank, chamber end. |
 |
| Finished barrel and a similar blank, crown end. |
The chrome-moly barrel was then finished with Cerakote, in Armor Black and sent to our "customer" who installed it on his rifle to see how we did. I doubt we are going to get it back ;)
 |
| Finished barrel, with Armor Black Cerakote applied. |
 |
| Barrel #1 installed on the Savage rifle. |
 |
| Range Day! |
 |
| Five shots - just under 1/2 MOA on the first day. Not bad for the first build on its first day at the range. |
Keywords: SR#1, .22-250 Rem, Armor Black


